Welcome to the seventh instalment of the JenkinsHeaven blog.
Apologies for the wait (life has kind of thrown some curveballs...)
Recently Bitbucket.org started offering private GIT repositories for free. :)
This a great option if you aren't ready to open source your code but you want to share your development effort with a small group (up to 5 including yourself) of friends.
So my migration problem was to migrate from a local VisualSVN installation to a remote BitBucket GIT repository and then get my local Jenkins master connecting to Bitbucket and successfully checking out the code.
I thought this would be a piece of cake....em....not quite. But then again everything is easy when you know how.
Before we get into the nitty gritty detail of how to configure Jenkins correctly I must first thank Bruno Kinoshita from TupiLabs for putting up with me sending docx files full of screenshots as we did the "its-working-on-my-machine-why-not-yours" thing.
Tools you need to install
To work with GIT repositories all you need to install is Git Extensions (version 2.46 is what I have installed, currently). this will install git itself (msysgit, which is GIT for Windows), a VisualStudio plugin and PuTTY. PuTTY is needed for the SSH certificates which is how Jenkins will talk to Bitbucket. (but we'll get to that) Right now just download and install Git Extensions. Follow the instructions here.
Environment Variables
All I have and all you need is the following to make Jenkins work with GIT:
- GIT_HOME=C:\Program Files\Git --> default location from Git Extensions installation
- HOME=C:\SSHKeys --> best to have a directory with no spaces
- Path contains C:\Program Files\GitExtensions\PuTTY
That's it for environment variables.
Create an account and Repository on Bitbucket
- Go to bitbucket.org and register an account with an email address and password.
- Click Repositories dropdown and click "create repository" at the bottom of the menu.
- Fill in the form and submit.
(At this stage it is an empty repository...that's ok, we'll fill it up later.)
Creating certificates
Now to get Jenkins and Git Extensions talking to Bitbucket you need SSH certificates
I have two sets of SSH Keys (a "set" being a pair made up of a public and private key) one for Jenkins and one for Git Extensions.
I would argue that this is necessary because the private key you get from the key creation process is called id_rsa with no ppk extension and as such will not be read by Git Extensions. Git Extensions can only be configured with file with the .ppk extension. And yes, before you ask if you rename id_rsa to id_rsa.ppk it still doesn't work.
Set 1 (for Jenkins)
Follow the instructions here.
As a result you should have 3 files in the C:\SSHKeys\.ssh directory (id_rsa, id_rsa.pub and known_hosts)
Set 2 (for Git Extensions launched via Visual Studio)
Simply use puttygen.exe, which was installed with Git Extensions in the PuTTY subdirectory.
This process will create a *.ppk private key and associated public key.
I have called mine pushonlykey_private.ppk and pushonlykey_public. These two files are in the C:\SSHKeys directory (NOT C:\SSHKeys\.ssh)
Populating your Bitbucket repository
In the below C:\GITRepositories is where I keep my local working copy of my projects:
- Export your source code from subversion with tortoiseSVN or command line to c:\temp
- Open GITBash
Then execute the following command in GITBash:
- cd to c/GITRepositories
- mkdir myrepo
- cd myrepo
- git init --> this creates a .git folder in c:\GITRepositories\myrepo. A bare git repo
Copy all source code files in c:\temp to c:\GITRepositories\myrepo with Windows File Explorer
Execute the following command in GITBash:
- git status --> lots of unversioned files
- git add *
- git add *.*
- git status --> lots of files ready to be committed
- git commit -m "initial commit"
- git status --> nothing to be committed
- git remote add origin git@bitbucket:<your username>/<your repo name>.git
- git push origin master
Navigate your browser to https://bitbucket.org/<your username>/<your repo name>/src and you will see your source code. :)
Configuring Jenkins to build from your Bitbucket repo
Now after all that preparation we are getting to the really fun stuff.
GIT SETUP
First, you need to install the git plugin via the update center in Jenkins.
I have the following configuration for GIT in Manage Jenkins > Configure System (search the page for "Git installations"):
Name: Git (can be anything)
Path to Git executable: C:\Program Files\Git\cmd\git.cmd
Install automatically is turned off.

JOB CONFIG
Almost there!!!
In your Jenkins job:
- Under Source Code Management, select the Git radio button
- Set repository URL to: git@bitbucket.org:<your username>/<your repo name>.git
- Set Branches to build to **
- Select bitbucketweb from the Repository browser dropdown
- Set URL to http://bitbucket.org/<your username>/<your repo name>/
- Hit save and start drinking!

Setting Up Git Extensions
- In an open repository select from the menu Remotes > Manage remote repositories.
- In the details box set Name to what you want and Url to git@bitbucket.org:<your username>/<your repo name>.git
- In the PuTTY SSH box set Private key file to "C:/SSHKeys/pushonlykey_private.ppk" (without the quotes)
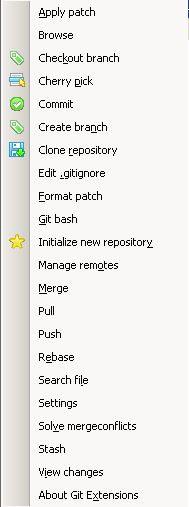
Access from Visual Studio
As you installed the Visual Studio plugin when you installed Git Extensions you will now have the following additions to the menus and toolbars to interact with Git Extensions and do at that Git goodness like staging your commits:

I'm pretty sure the above instructions will work correctly. I specifically retested the populating BitBucket steps from scratch with another test repo. Let me know in the comments if anything else does not make everything "just work"
Come visit my other site at fullcirclesolutions.com.au. All my best ideas are distilled into commercial tools and made available for purchase.
Till next time...
Hi Andrew! That's always nice work with you! I've seen you updated the Git Plugin Wiki too!
ReplyDeleteI think the guys from BitBucket should add your instructions to BitBucket documentation too: http://confluence.atlassian.com/display/BITBUCKET/Bitbucket+101
What do you think?
Hi Bruno, responding to your comment here for everyone's benefit. Sure who should we contact from Bitbucket? Would love to see it integrated into the Bitbucket help.
ReplyDeleteHi, there! I can connect to bitbucket with "ssh -vT git@bitbucket.org", but when I configure the repository url in jenkins, I get the message:
ReplyDeleteFailed to connect to repository : Command "C:\Program Files (x86)\Git\bin\git.exe ls-remote -h https://cacio-costa@bitbucket.org/cacio-costa/cdi-se.git HEAD" returned status code 128:
stdout:
stderr: fatal: Authentication failed
Can you help me? Thanks...
I solve the problem. I put my password in the url: https://cacio-costa:PASSWORD@bitbucket.org/cacio-costa/cdi-se.git.
ReplyDeleteBut thanks for your instructions. Them make me achieve the OK build.
hi
ReplyDeletewhen I tried to set repository url for a job, it gives an error if I use SSH as url but if I use https it doesn't give such error but gives an error when building about "Spawning processes from build" is there something else we have to look at
Hi Jayanga,
ReplyDeleteAre you talking about step 5 of Job Config above?
Can you not use http://...?
Can you try that first? Let me know how you go.
Thanks, this helped me a lot.
ReplyDeleteHTTP Status 404 - /jenkins
ReplyDeletecould you please provide more context Vineet?
ReplyDelete